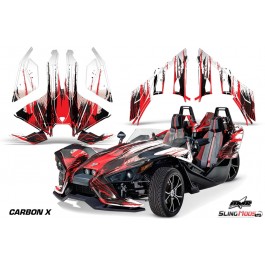
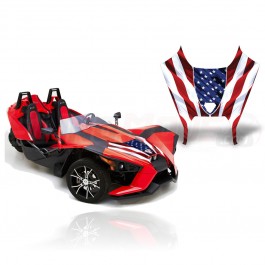
AMR Roadster Hood & Side Panel Graphics Kit for the Polaris Slingshot
- Login & Earn 250 Points when purchasing this item
- Part Name: polaris-slingshot-amr-roadster-hood-side-panel-graphics-kit
- Part Number: SM-2138
- MADE TO ORDER - PLEASE ALLOW 5-10 DAYS TO SHIP!
| 2015 | Slingshot Base / SL / SL LE |
| 2016 | Slingshot Base / SL / SL LE |
| 2017 | Slingshot Base / SL / SL LE / SLR |
| 2018 | Slingshot GT LE / S / SL / SLR / SLR LE |
| 2019 | Slingshot GT / S / SL / SLR |
| 2020 | Slingshot GT LE / R / SL |
| 2021 | Slingshot R / R LE / S / SL |
| 2022 | Slingshot R / S / SL / SLR |
| 2023 | Slingshot R / S / SL / SLR |
| 2024 | Slingshot R / S / SL / SLR |
AMR Racing Hood & Side Panel Polaris Slingshot Roadster Graphics Kit
Looking to make your Slingshot stand out from others? Paint can be quite expensive, and permanent. AMR's Roadster series graphics set will be a show stopper, and is printed on 20-Mil, 3 Layer, decal material. These graphic kits are printed on 3M vinyl with UV resistant inks that will prevent fading for up to 5 years. Not only will these graphics look great on your Slingshot, it will provide a layer of protection that is scratch and fade proof, protecting against rocks and small debris.
This kit wraps the most of the front hood and side panels. It is normal to have small gaps between each graphic. This is not a vinyl wrap, it is a high quality graphics kit.
Recommended Tools:
- Spray Bottle filled with a mixture of water and a few drops of dish washing liquid.
- Squeegee
- Heat Gun
- Isopropyl Alcohol (Rubbing Alcohol)
Installation:
- Thoroughly clean all panels on your Slingshot. We recommend wiping clean the plastic panels with Isopropyl alcohol to remove any debris and to insure maximum adhesion of the graphics.
- Identify all parts of the kit to be installed before starting. Hold them up to the corresponding body panels so you understand where and how they need to be placed and how the artwork intersects. If you have panels that will have merging artwork from two different pieces, examine how the artwork will line up with each graphic at the junction points. There is normally a gap in the artwork to get it to line up correctly. (Some parts are not intended to line up).
- The water bottle you're using should only have about 6 drops of soap for the entire spray bottle, the rest is water. Soapy water is recommended for larger pieces larger than 1.5 ft. in diameter. Spray down the area with the water / soap mixture and float the graphic on the surface area. Once you're satisfied with the placement of the graphic for that location, use a squeegee to remove excess liquid and air bubbles.
- You should start with the largest part of the graphic and work into the smaller pieces, as the smaller pieces are easy to maneuver. You should also start from a high point and work downward if possible to allow the water to flow downward when you use the squeegee.
- Apply heat from a blow dryer or heat gun to remove any wrinkles or air bubbles after the installation of each piece. Please be careful no to apply too much heat as the material can deform and stretch up to 1 inch with too much heat.
- After the entire kit is installed it's a good idea to apply moderate heat to each graphic with a good rub across each graphic and each edge. This final heat allows the adhesive to "set" and lock the graphic in place. You can use a non abrasive cloth to apply even pressure across the entire graphic as you apply heat to make sure it tightly bonds to the surface.
- Allow the graphics to sit for 24 hours before driving your slingshot to properly allow the adhesive to set.| Product Details | |
| Color | Varies |
| Material | 23-Mil - UV Protection, 3M Glue |
| Return Policy | Custom made to order - No Returns |
| Warranty | Guaranteed no fade 5-year |


